
How do you upload files and photos via a Firebase Google Cloud Function to a Backblaze B2 storage bucket?
Table of Contents
Introduction
In this article I show you how you can receive files and images trough a serverless Firebase Cloud Function, process them and then stores the files in a Backblaze B2 bucket.
This function can be used, for example, to upload profile pictures or download data. The sender can be a simple HTML form on a website or an upload function in an APP.
Why Firebase Cloud Functions?
Cloud Functions allow to execute Javascript code in the backend without the need to run a server. Not only do you save a lot of setup time for a server, but you also don’t have to worry about the security and administration of the server. The same applies to the storage of data in a bucket, but of course you should still pay attention to the security and accessibility.
Another advantage of a serverless function is the scalability. Cloud functions are only active when they are addressed. Unlike a normal server, which must always be active and accessible. Cloud Functions can therefore wonderfully intercept load peaks and only pay for the actual use.
Why Backblaze B2
Why should you use Backblaze B2 and not the Google Cloud Storage already integrated in Firebase? Cost!
Backblaze is a US-American company that became famous for its backup software. Similar to Amazon, they decided to make the technology to run this service available to others.
Currently, one gigabyte of storage at Backblaze costs $0.005 per month. With Google Firebase it is 0.026 US dollars per GB, which is almost five times the cost of Backblaze B2.
The traffic for the upload is free with both providers. Per 10,000 upload operations, however, Firebase charges $0.004. There is no charge for the API upload call, but the transaction for authentication (b2_authorize_account) is charged. Per 10,000 requests this is $0.04.
Download traffic is charged at $0.01 (Backblaze) and $0.12 (Firebase) per gigabyte. In addition, there is $0.004 per 10,000 API requests.
However, Backblaze has a free tier of 2,500 API calls and 1 GB traffic per day. In addition, there is 10 GB of storage per month for free.
Firebase also comes with an allowance. The Spark Plan includes 5 GB storage, 1 GB download traffic per day and 20,000 download calls and 50,000 download calls per day.
The pure storage costs for 100 GB are therefore $0.45 (Backblaze) and $2,47 (Firebase). By the way, the costs for storage at Amazon S3 would be in the range of Firebase.
Before you decide on one of the providers, you should calculate exactly which one makes the most sense for you.
The current prices can be found on the website of Backblaze and Firebase.
Setup
Of course you should have an account with Backblaze and Firebase. Furthermore, the commandline-tool of Firebase should be installed.
An important point with Firebase is that the billing plan is set from Spark to Blaze. This is the only way to enable connections outside of the Google Cloud.
Backblaze API Keys
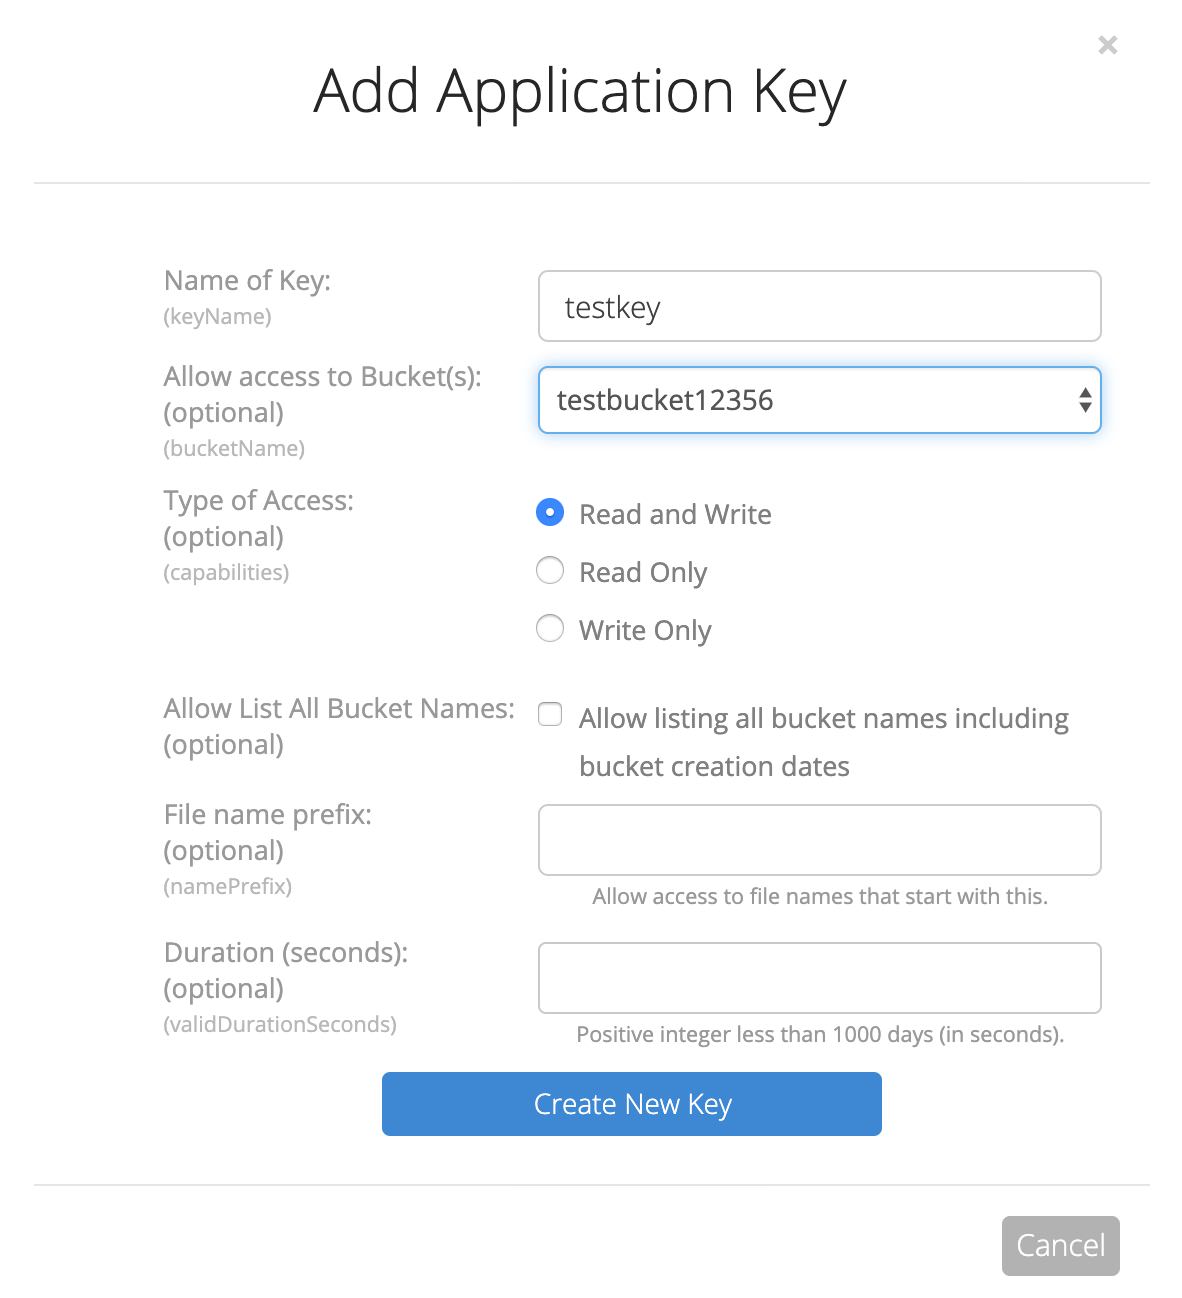
For authentication we need an API key from Backblaze. The Master Key can be used for this. For security reasons, however, you should create a special key for this function. This is easily done on the website under “App Keys”. Here you can limit the access to only one specific bucket.
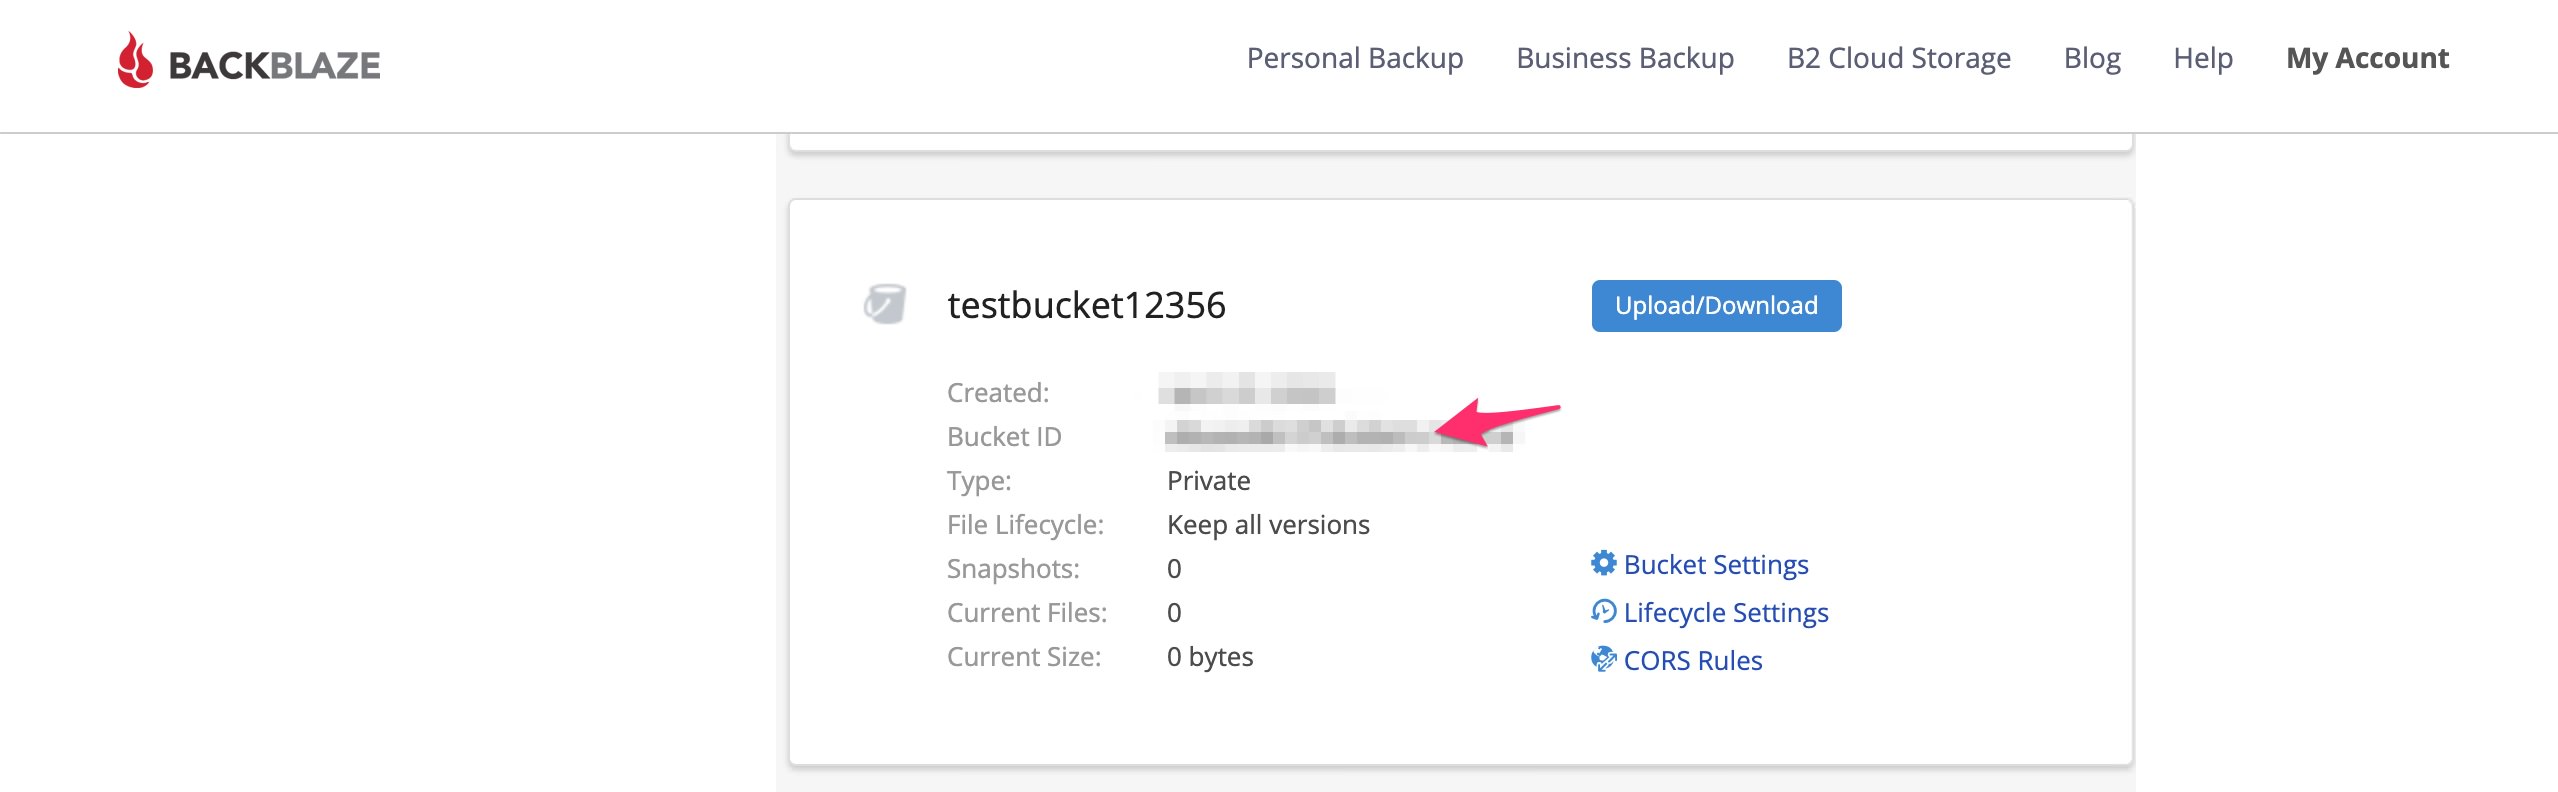
After creating the key, note down the keyID and the applicationKey. We need these later. Also needed is the BucketID. This ID can be found in the info card on the overview page of the buckets.

Code
The code for this function is actually quite simple and can be easily extended if necessary.
The node.js module “busboy” parses the HTML Form Data and writes the incoming file into the temporary storage of the cloud function. Afterwards the authentication of B2 takes place and the file is written to the specified bucket.
In the following I will go through some important parts of the Cloud Function. You can find the complete code on Github.
This is probably the most important part of the function. Here you have to provide API data from Backblaze.
// Initiate B2 with auth keys
const b2 = new b2CloudStorage({
  auth: {
    accountId: "<keyId>", // The unique keyID to the key
    applicationKey: "<applicationKey>",
  },
});
const B2bucketId = "";
In this part the name of the file is defined. As an example, we will simply use a random combination of numbers here. Of course you can easily use your own scheme.
// Get file extension
const fileExtension = filename.split(".")[filename.split(".").length - 1];

// Select filename / Random number with file extension
newFileName = `${Math.round(Math.random() * 1000000000000).toString()}.${fileExtension}`;
This part is responsible for uploading the file. If you want to sort the file into a specific directory, you have to do this in this part.
b2.uploadFile(tempFile.filepath, {
          bucketId: B2bucketId,
          fileName: tempFile.newFileName,
          // Upload to a directory
          //   fileName: "userfiles/" + thumbFileName,
          contentType: tempFile.mimetype,
        },
After the successful upload, this example returns a simple HTTP response. Of course you could integrate other actions here. For example save the data in the Firestore database or send back the filename.
If you want to compare the saved version with the temporary file again, this is also possible. In response Backblaze also sends the MD5 and SHA1 hash.
  function (err, results) {
          if (err) return res.status(500).json({ error: err });

          return res.status(201).json({ message: "File uploaded!" });
        }
In the complete code there is also a special function for the upload. This function checks whether an image is involved using the MIME type. If this is not the case, it sends an error to the requestor.
 if (
      mimetype !== "image/jpeg" &&
      mimetype !== "image/png" &&
      mimetype !== "image/gif"
    ) {
      return res.status(400).json({
        error: "Wrong file type",
      });
    }
Extras
Of course this function can still be extended and adapted in many aspects. So it is also possible to use another event as trigger. For example, when creating a file in Firebase Storage, the file can be saved directly on Backblaze as a backup.
Environment variables
The API key and the bucket ID should not be stored directly in the code if possible. For this you can use the environment variables of Firebase.
You have to run this code, with the appropriate values, on the command line.
firebase functions:config:set b2.keyid="{keyId}" b2.appkey="{applicationKey}" b2.bucketid="{BucketID}"
The values can then be requested up accordingly.
const b2 = new B2({
  auth: {
    accountId: functions.config().b2.keyid,
    applicationKey: functions.config().b2.appkey,
  },
});
const B2bucketId = functions.config().b2.bucketid;
Select region
Both Firebase and Backblaze offer distribution and storage in different regions of the world.
Reasons for the choice can be price (in this case it makes no difference) or jurisdiction and requirements. In most cases, however, the underlying idea will be speed.
If possible, the storage location should be close to your target audience.
Backblaze currently offers only two locations. US West, where the data is located in Sacramento (California) and Phoenix (Arizona) and EU Central, with Amsterdam as the location.
With Google Firebase you have some more options. At the moment you can choose between us-central1 (Iowa), us-east1 (South Carolina), us-east4 (Northern Virginia), europe-west1 (Belgium), europe-west2 (London), europe-west3 (Frankfurt), asia-east2 (Hong Kong) and asia-northeast1 (Tokyo).
The selected region is indicated directly in the code. For Frankfurt, for example, this would be this section.
exports.uploadFile = functions.region("europe-west1").https.onRequest((req, res) => {
Of course, one should not only consider the proximity of the cloud function to the visitors, but also to the Backblaze B2 Bucket. Depending on the location, there might be a higher upload latency.
Resize images
If you work with images, you will probably want to process them before uploading. For this you can use the Node.js module “sharp”. This module can easily enlarge and reduce image files in all desired sizes. If you want, you can also convert the image into another format like WebP.
Download
You can find the complete code for free on Github.